Find us on Google+ Inventor Tales

Wednesday, November 01, 2017

Lessons from Life's Workbench - Finding Rivet Diameter and Length from the Part Number

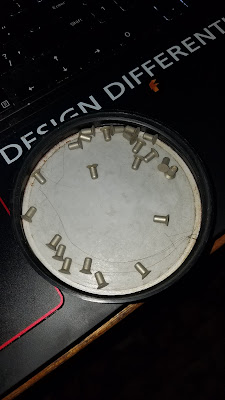
A few counter sunk rivets corralled
on my laptop
One thing I've learned about aircraft fasteners is that their part numbering system is like speaking another language.  But if you can understand the language, it all begins to make sense.   

Although I admit, it might take a little while!  But if you work with it, the patterns begin to emerge.  

For my sample, I'm going to use solid aircraft rivets.  It's the first fastener I learned the part numbering system for, and it gave me a basis to become familiar with other fasteners as I encountered them.  

So let's say we're given the part number MS20426-AD4-5.  You're first reaction might be: That means absolutely nothing!!

But in reality, it does mean something, once you learn to speak the language.  

Here's how to begin to break down the seemingly cryptic system.

I'll start by separating the part into it's key components. Each group of the number means something, although some mean more than others.

MS20 * 426 * AD * 4 * 5

MS20 - This part of the number tells us it's part of the Military (MS) standard

426 - This designates the head style for the rivet.  In this case, 426 tell us this is a countersunk rivet. The other common rivet style is designated by the number 470, for a universal (domed) head

AD - This designates the material of the rivet.  AD is 2117 aluminum.  Other examples of material and designations are: 
          A - 1100 or 3003 Aluminum
          DD - 2024 aluminum

4 -    This designates the diameter of the rivet in 32nds of an inch.  In other words, this example has a diameter of 4/32nds of an inch.  In other words, 1/8th (.125) inches.

5 -     This final number represents the length of the rivet in 16ths.  For our example this rivet is 5/16ths (.3125) inches long
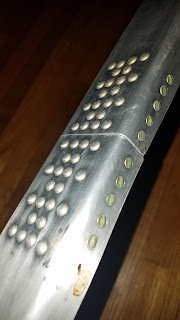
A sample of  universal (MS20470) rivets
on the left, and countersunk (MS20426)
rivets on the right. 

So that's a quick example of a rivet part number.  Granted, not all of the numbers are intuitive.  Why 426 and 470 to designate head styles?  I have no idea.


And while there will be differences from fastener to fastener, the diameter and length can be derived from the part number.

So bear it in mind!  I hope that helps you out when you're thumbing through another catalog! 

Acknowledgments and Additional Resources

Aircraft Spruce - I've gotten a few tools and supplies here.  I've linked to their page on rivets not because you can buy them here, but because their page breaks down the part numbers clearly. 

Aviation Maintenance Technician Handbook - Right off the FAA website.  Check Chapter 4, Page 4-31 for more information on the rivets I touched on here. 

World Fasteners - Another site I like because they have a visual guide of different fasteners and their root part number.  You can see their visual catalog here:


Sunday, October 29, 2017

Placing an Assembly into a New Design in Fusion 360

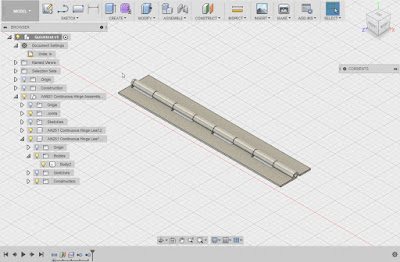
Last week I talked about how I used the Paste New functionality in Fusion 360 to quickly create a continuous hinge. 

A close up of the continuous hinge as it was finished in my previous post. 
My goal in creating this hinge, was to use it as a template so I can reuse it later.  However the thing with continuous hinges is that they're cut to size.  So even though the original hinge stock starts out 36 inches long, it can, it is often cut down to a much shorter length.

So what I'd like to do is insert the hinge into an assembly and cut the hinge to the length needed for that particular application.

The finished hinge placed into position.

I started out with my target assembly opened and saved.  For the sake of keeping the example simple, I'm going to use an empty file for the target assembly, but the steps are the same if there are other components already placed.

Now, I locate the hinge I intend to use in my data pane, right click on it, and choose "Insert into Current Design".

That will insert the file into the current design. 


The next thing I have to do is cut the assembly to size.  This required me to break the link with the template, so I can make the part independent from its parent. 

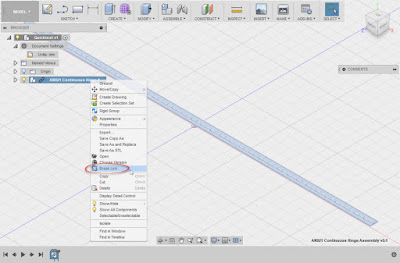
I can do this by right clicking on the part in the browser and choosing "Break Link". 

Breaking the link to the original hinge.
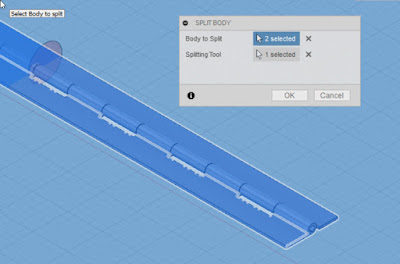
Now it comes time to cut the part down to size.  Naturally, this may vary for different parts.  In the case of the hinge, I used an offset work plane to split the solid bodies that make up each hinge leaf.

Splitting the hinge leaves using the split tool and a workplane.  The workplane is
off screen (it's why the background is blue). 
Now each hinge leaf is split into two bodies, which can be removed from the model using the "Remove" tool.  You'll have to locate the bodies underneath each component.  I've numbered them in the image below.


Hint!  Don't use the delete tool!  It can cause your features to blow up!

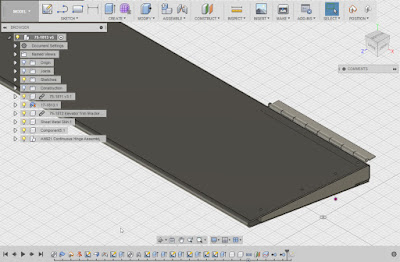
But now, with the hinge sized, it can be positioned as needed in its new home!

The hinge is completed!
In conclusion!

Personally, I like how this workflow allowed me to take an assembly, place it, and modify it quickly.  I can cut the hinge down, add holes, all without harming the original. 

I'm particularly pleased with how I can contain the hinge in a single design, and not create three separate files (two parts and an assembly).

I do feel a few pangs of guilt about breaking the link to the parent, since if the parent changes, the hinge derived into this assembly won't be updated.  But for the most part, standard parts such as this don't change often, so I think I can live with that possibility. 

All in all, I think there is much more to be gained with this flexibility!


Wednesday, October 25, 2017

Galvanic Corrosion - Lesson's from Life's Workbench

In the last few months, I've been spending a lot of time reading for my aircraft maintenance class.  I've been through my General text, and I'm halfway through my Electricity book.

These two books are well worn from reading. 
Naturally, that takes away from my time working on things like Inventor and Fusion 360.  So I thought to myself, why not share a few of the lessons from my studies?  It'll help me study, and maybe help out someone else who's trying to learn themselves.

Consider it paying forward!  So every Wednesday, I intend to post a tip on a little something I've learned about design in my studies.

Without further delay, here's a lesson that had faded into the archives of my mind, only to be relearned.

A Life Lesson on Galvanic Corrosion

When two different metals are attached to each other, there can be an electrical potential between the two metals.  One metal will act as an anode, the other will act as a cathode.  If an electrolyte, such as water is added, a chemical reaction known as galvanic (or dissimilar metal) corrosion will occur.

When that happens the anodic material will be eaten away by the cathodic material.  For my tests, I remembered it as the "cat" the one that does the eating.

Galvanic Corrosion between Copper (Cathode) and Iron (Anode)
By Ricardo Maçãs - Own work, CC BY-SA 3.0,
https://commons.wikimedia.org/w/index.php?curid=17645877
Galvanic corrosion can be mitigated by isolating the two materials from each other.  Another solution is to use materials that have similar galvanic potential.  Several charts can be found in textbooks and on the web.  Here's a basic one from Wikipedia.

Just remember to keep the two materials as close as possible!

Yet one more is to attach a third, more anodic material to the assembly.  This sacrificial material will corrode away first, saving the other two.   You can see some good pictures of sacrificial anodes on a ship hull here.

No matter which method is chosen, designing for corrosion is something that can make a difference between a product having a long life, or a painfully short one.

I hope this first little tip is one that helps you out! I'm hoping to post some more soon!


Sunday, October 22, 2017

Using Fusion 360's "Paste New" to create Similar Parts

Before diving into my next post, I wanted to say that I'm glad the solution I shared to fix the broken threads issue in Autodesk Inventor helped so many.  When it first occurred earlier this week, I thought it was just me.  Little did I know that so many others would run into it!

I originally found the issue on the Autodesk Community, so credit where credit is due.  The link to the post where I found the information is in the original post, as well as linked here.

Now, I'm back to a little Fusion 360 work I've been doing.

As part of an ongoing project, I've been slowly building different parts here and there, mostly off of vintage prints from AirCorps Library

One of the challenges I ran into was building a model of a continuous, or piano hinge.  It's based on the AN951 standard, which has since been superseded by the MS20257 standard,

One hinge leaf.  A little examination shows how it's mate has to
vary to mesh correctly.

Modeling the hinge isn't a difficult task, building the individual hinge leaves is easy, but they need to be made to mesh correctly.   That means the hinge knuckles have to be offset, and that's where the knuckles have to be different.


But other than that, everything is the same only the hinge knuckles vary.  So it would be ideal to be able to create a new copy of the existing hinge leaf, and make the appropriate changes. 

It turns out that Fusion 360 has a functionality known as "Paste New", and it's exactly what I needed.  It will create a new, independent copy of first hinge leaf, while leaving the original alone.  That means being able to reuse as much of the design as possible, while only changing what has to be changed.

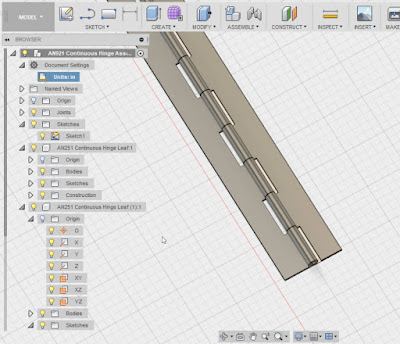
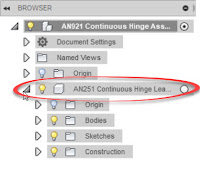
I started with an assembly with one of the leaves modeled as its own component.  You can see that in the browser..  Now it's time to make the other side of the hinge so it can be changed so it can mesh with its mating hinge leaf.
The browser with the new part modeled
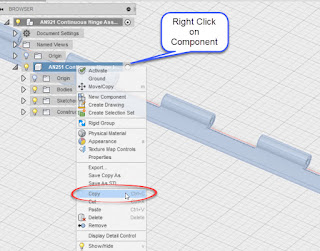
 All that needs to be done is to right click on the existing component and choose "Copy".  It's just a good old Windows Copy.

Copying the part is where it all starts. 
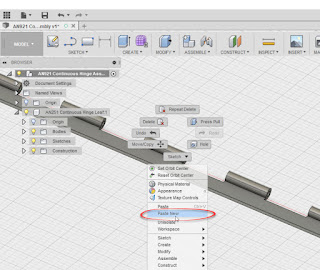
Now move the cursor onto the modeling canvas, right click, and choose "Paste New".  A new, independent, hinge leaf can be placed and positioned. 

Pasting the new copy using the Paste New command
I'd suggest getting the part as positioned in it's "nearly" correct position.  Then you'll be able to make changes to key features, the hinge knuckles in this case.

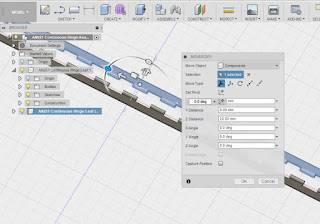
Positioning the part. You can use the handles, or dialog box.
Now all that's left to do is activate the new copy, modify it so it meshes with the original, and assemble.  And we're off to the races!

There it is!  All done! 

So keep this in mind when you have similar components to build, and modify it for your needs.  It can really help in not recreating extra work!

Thursday, October 12, 2017

I Can't Select Threads in Autodesk Inventor! - An Old Nemesis Rears its Head!

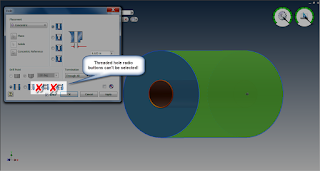
My threads! They don't work! 
Earlier this week, I noticed that I couldn't select threads in my installation of Autodesk Inventor 2015.  Knowing the solution, I shrugged, fixed it, and went about my day. 

I just chalked the incident up to a fluke.  You know, just "one of those things".

If you want to jump straight to the solution, here it is from my post about 3 years ago!  Fix your Inventor! 

But today, I stroll into work, and find out that several of our machines can't place threads, so I spend a chunk of my morning fixing machines, and making videos showing others how to fix their machines.

We'll, it seems there's something more to that.  The word on the street is that a Windows update to Windows 7 and Windows 10 caused the issue. It affects Inventor versions 2016 and earlier.

It makes sense to me!  Too many machines were knocked out at once! 

Thankfully, the fix is easy once you know how! 

Good luck!


Tuesday, October 10, 2017

Expanding My Comfort Zone in a Composites Workshop

This weekend I spent time away from the computer and got my hands sticky at an Experimental Aircraft Association Workshop on composite  construction.

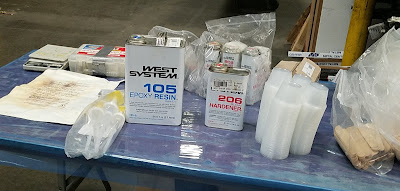
A few of the supplies for our class.
These are the tools of the composites trade.
It was a lot of work, and it took most of my weekend.  But I learned so many things from it.  I learned from the instructor, from my fellow students, and I learned when I a step in my project went right, and I learned more when a step in the project went wrong!

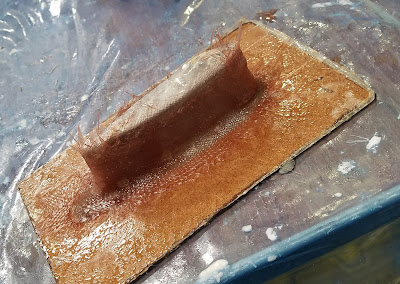
The class started out with the necessary lecture on the basics of what composites were, and the basics of their construction.  That was followed by a description of our first project, a basic layup of a plate.

Several plates curing under vacuum

My finished plate, awaiting trimming.


In that project, we practiced laying up fiberglass over a foam core, carefully smoothing resin over the glass so not to disturb the direction of the weave.  The instructor took time to point out, "the weave is the strength of any composite.  If you disturb it during layup, the strength of the final product can be lost."

A video showing the hot wire method of cutting foam


My finished project
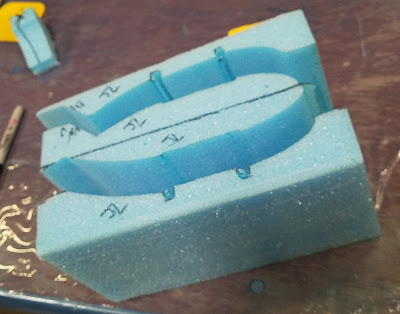
We also made a sample fairing by laying fiberglass over a form.   In involved using modeling clay to make a radius and laying fiberglass over the form.

My form for the fairing.
If you look carefully, you can see the fiberglass on the form.
Each project required finishing and trimming.  We mixed micro-balloons and cotton flock with resin to finish edges and fill voids.

My plate from my previous project.
The edges are filled with a resin mixed with micro-balloons


I even saw forms and clamps that had been 3D printed!  I would have thought the resin would have destroyed the printed plastic, but apparently it holds up just fine!
A 3D printed form for a NACA duct!
Who'd have thought.

Who would have thought that!  I go to learn a little about composites, and end up learning something I didn't know about 3D printing!

So what is the point of all this?  Sure, I could go on and tell you that this class was amazing and turned me into an expert in a matter of days.

But that would be a bold faced lie.  I'm no expert, I know just enough to get started.  My parts are barely even passable.  I wouldn't trust them in a real world application.

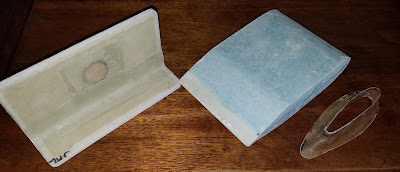
My three projects,.  From left to right: the Tee, made from a plate, fiberglass over a foam core
and a fairing made over a form.

But they taught me that I can learn, and I can do better the next time and to go out there and take a step beyond the line that represents the boundary of your comfort zone.  And that was the goal of the class!

And mostly, don't be afraid to try new things!  You never know what you might learn! 

Thursday, October 05, 2017

Great Resource for Designing with O-Rings

Busy times at work and home have kept me from doing much work with Fusion 360, as I've been splitting my time between a couple of long days at work, and doing a little reading on aircraft electricity for an upcoming test.

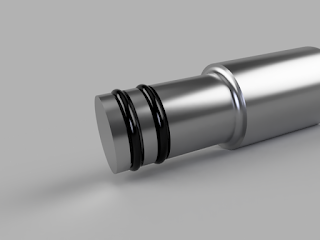
An example of an O-ring
The rendering was created in Fusion 360
But while I've been busy working and studying, I did have find myself visiting a nice little design aid I've used in the past.

In my past design work, I've had design O-ring grooves, also called, glands.

It wasn't something I did often.  As a matter of fact, it always seemed I had to design a gland right after the information I had learned had faded into the fog of time.

The process I've typically encountered for designing a shaft and bore for an O-ring involved finding the approximate size for the components to be sealed, then selecting an appropriate O-ring, then sizing the shaft, bore, and groove that would work for the design.

All this was done by referencing the design data, adjusting the dimensions, and double checking again.

It wasn't difficult, but it was tedious and time consuming.

The shortcuts to
the tools are on
the homepage

But recently when I revisited a little O-ring design, a lucky Google search led me to a website run by Apple Rubber, a seal supplier in the United States.  The panel on the right of the home page is noteworthy.   It's on that portion of the homepage you'll find the links I took the time to write about.

Apple Rubber has provided some helpful resources to design O-ring geometry, as well as choose the right material for the medium and temperature range the O-ring will operate in.

The biggest thing I used it for was their O-ring Calculator, which helps size O-Ring glands for proper size and compression of the O-Ring.  You can find that link here.

The O-Ring Calculator has provisions for standard and custom O-rings, as well as Imperial and Metric O-Ring sizes. So in short, it covers the situations the typical user will encounter.

But the page doesn't stop at an O-Ring calculator alone, and even if it did, that would be enough.


There's also a Chemical Compatibility Guide, and a Seal Design Guide.  Both of these pages are well worth saving to your browser history!

If you've worked with O-Rings before, you probably know that an O-Ring that will provide a long happy life sealing one fluid may be quickly destroyed in another medium.

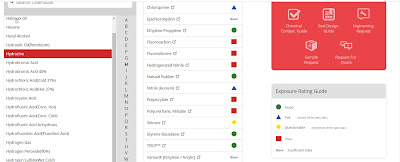
The Chemical Guide allows a user to quickly choose a medium that a seal will encounter, and then tells you how materials may be expected to hold up using a "Good/Bad" type of scale.

The Chemical Design Guide using Hydrazine as an example
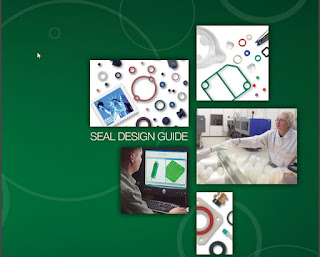
The Seal Design Guide is a handbook on designing for seals, and it's certainly one of the books I wish I had back when I was in  college

The cover off the Seal Design Guide.
It's available as a PDF!
So give this website a try if you're looking to design, or just want to learn about designing for O-Rings, I'll certainly be using it again myself!

And on that last note, just like my previous post on Coast Fabrication, I'm not getting compensated in any way for sharing this information.  I just like the site enough that I think it's worth sharing!


Tuesday, September 26, 2017

Coast Fabrication - A Great Source for Fastener Information!

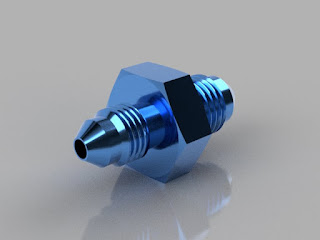
A sample of a Hydraulic coupling rendered in Fusion 360
In this post, I'm actually taking a step back from directly talking about a design tool.  Instead, I'm sharing a little info on where I get the information to put my design tools

At work, one of my tasks is creating and maintaining Autodesk Inventor Content of aerospace fasteners.

And trust me, there are a lot of these fasteners around!

They can be referred to as AN (Army/Navy), MS (Mil Spec), NAS or NASM (National Aerospace Standard), and AS (SAE Aerospace).   And I'm sure I've missed a standard or two somewhere! 

That means a lot searching databases, reading charts, and sifting through a lot of tables!  

Of course that begs a big question?  Where can this data be found?  

Admittedly, it can be quite a safari.  I'm fortunate that my place of employment maintains a resource for the data.  

But not all of us have that luxury.  That means a lot of hunting around, trying to find the data we need.  

One resource I found that has been a enormous help has been the technical resource page from Coast Fabrication in Huntington Beach, California

More than once I've used their technical page as a quick reference for a fastener I'm using, sometimes for work but other times for personal use.  

This is just a section of the Coast Fabrication Technical page


The reason I shared this site is because I know that there are many times users need this information.  It might be to create a library of helical inserts for work, or a quick model of a hydraulic fitting for a personal project, this is a sight that is well worth the reference!

Of course, a blog post like this wouldn't be a blog post if I didn't have a disclaimer.  I'm not paid by Coast Fabrication.  I've never even visited their shop even though their only about 10 miles away from me. As a matter of fact, I'm pretty sure they don't even know I exist.  

But that's okay!  They've provided a great resource worthy of sharing, and I'm happy to help Karma return some of their goodwill!  So take a look if you're in the need for fastener specs.  


Monday, September 18, 2017

Easing selections using the "Select Other" tool in Fusion 360

In my last post, I mentioned changing the opacity of a part in Fusion 360.  The intention was to make it easier to transfer geometry from one part to another. 


This part is giving me a lot of mileage! 
I also mentioned that it can make it easier to select a part laying underneath another.

But the reality is I only told a part of the story.  Just being able to see an underlying part, step two is being able to use that part's geometry.

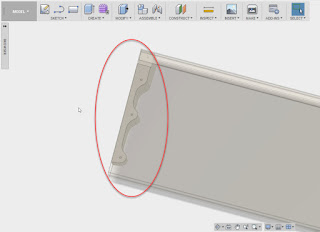
Three holes to be projected.
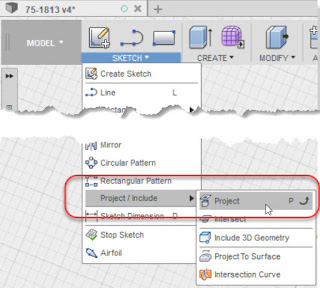
For example, if I want to transfer the holes from the ribs to the skin of the tab, I can activate the sketch in the skin, and project geometry from the rib to the skin of the tab using the Project tool.

The Project tool is your friend!

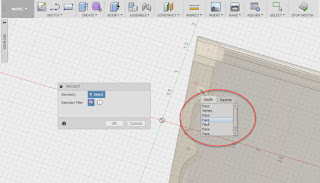
But those are some tiny holes under some thin sheet metal!  That means that I only have a small target to hit with my cursor, with lots of other geometry that can get in my way.

The trick, with Project tool active, left click and hold the left mouse button down.  After a moment, a list of geometry that can be projected will appear.

The options to select various geometry.
Just choose from the list!


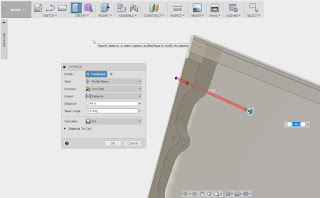
All that's needed is to choose the desired geometry from the list.  The geometry, in this case a hole, can be used to create the needed cutout.

Extruding the projected geometry
So give select other a try.  And it's not just for sketches.  It can be used any time selecting from multiple pieces of geometry is needed!


Sunday, September 17, 2017

Creating a Part by Projecting Geometry from Another Part in Fusion 360

One of the goals I set  for myself is to try to spend some time every week to build something in Fusion 360.  Sometimes, all I can do is create a patter of holes, or build a few sheet metal flanges.

But I always tell myself I'll try something new in Fusion 360.  

So far, so good!

One thing I've been trying is making different parts, some of which have been sheet metal.

I've got ribs that will support a sheet metal.  The component is an aircraft trim tab.  There are two ribs at each end of the tab.

The sheet metal forming the tab will wrap around the ribs and attached via rivets.  That means that the sheet metal will be following the ribs, so why not reuse that geometry instead of trying to recreating with a lot of "measuring and calculating".

The first thing to do is to assemble the ribs in their final position and orientation.

The ribs place and oriented, ready for sheet metal.
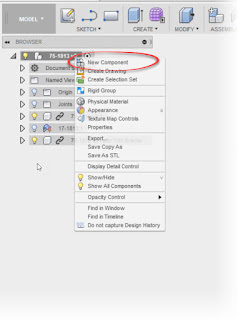
The next step is to create a new component in the Fusion assembly and activate it.  Select it as a sheet metal part and set your sheet metal rules.

If your not sure about creating sheet metal rules, my previous post here may help.


Create a new component

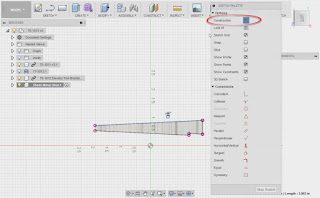
Now, create a sketch, and being projecting geometry from the existing parts.  


Now project the geometry that will be used to help define the new part.  I'd recommend making it construction geometry to make sure it doesn't accidentally add itself to your part. 

Creating construction geometry to build a part.
Now sketch out the profile required.  In this case, it's the shape of the sheet metal part. 

Projected geometry to form the sheet metal profile.

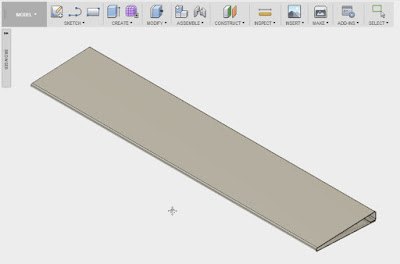
Now it's a matter of creating the sheet metal flanges to the distance needed to define the part.

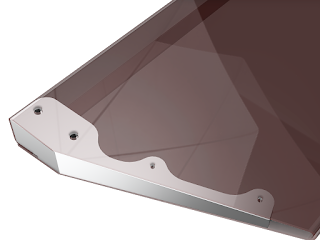
The sheet metal part extruded.
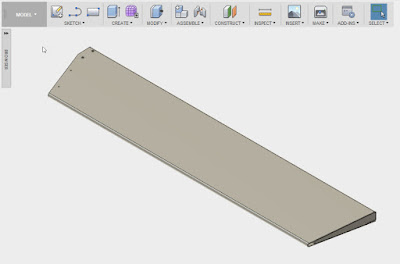
Now continue the process of defining the part.  This includes other features, such as extrusions and holes.

Additional features can be created by projecting from another part.
Give it a try, it can make creating another part much easier than transitioning measurements! 

Bonus tip! 

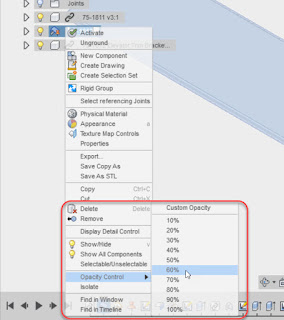
Change your part opacity by right clicking on a component and choosing "Opacity Control".  You can make the part semi-transparent and make it easier to see underlying geometry! 

Try changing Opacity to make selecting through parts easier.
Acknowledgements: 

Trim tab created from drawings accessed via my subscription to Air Corps Library.

Thursday, August 31, 2017

I've Got Great Designs in Fusion 360! But How Do I Find Them?

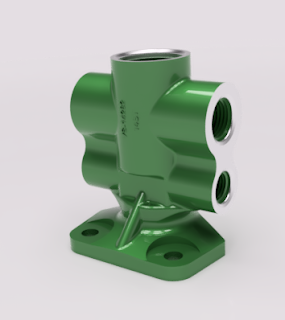
A valve housing I built, I'd hate to lose this! 
Lately, I've been posting about building models in Fusion 360, especially with the addition of sheet metal tools.  (Yay!)

But the most stunning Fusion 360 file in the history of stunning Fusion 360 files does no good if you're not able to locate it in the sea of slightly less stunning Fusion 360 files.

As I've started accumulating models, I found myself thinking; "How to I find a given file as I create more designs?" or, "What happens, if I misplace one?!?"

I haven't yet misplaced a file yet.  But it will happen some day, and I'll have to make sure I can find it again when I do.

Thus, I was led to the Data Management side of Fusion 360, to try a little simple searching.

The first thing I had to do was log into my A360 hub here.  That opens up the A360 hub, where I was greeted with a list of the projects I've created over my time using Fusion 360.

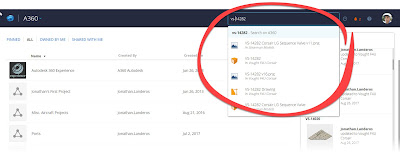
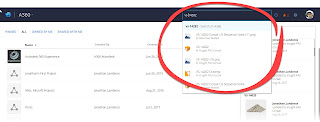
From there, it was a fairly simple matter of locating the search icon, typing in a file name, and letting the search tools do their job.

In my case, I picked a valve housing I had worked on.

Searching for the housing


When the file opened in my dashboard, I could see a thumbnail, what other designs this housing used, and where this file was used.  In my case, I'm not yet using this design elsewhere.  I can also access drawings created from this part.


Now there's quite a bit that can be done from this screen, so I'm not going to go into it all in this post. I'd be typing forever!

But I will point out two icons that are well worth looking at.

The first, is the View icon, which will open up the file in a viewer, the other is the Edit icon, which will open the file in Fusion 360 desktop, and the browser if available.


Just these functions alone helped as I was exploring alone, and there are more functions in the viewer. But like I said, I'm going to save those for later!  It's getting late, and I have to sleep sometime.


But remember to take advantage of the hub if you're using Fusion 360!

I think it'll help you out!