“Perplexity is the beginning of knowledge.”
Kahlil GibranFor a long time I've considered talking about how I've set up Autodesk Vault that I've used for my side projects, and why I did what I did. I've avoided it, to be honest. if only because I had no idea where to start.
Finally, I've decided to start at the very beginning, and just branch out from there. This blog will talk about basic setup. Future blogs will go a little bit deeper. There's too much to talk about to squeeze in one entry.
Before getting started, there has to be a disclaimer. My Vault is set up this way because I decided to set it up this way. It's an example of one approach, not necessarily the only approach. I happen to prefer this method for my particular situation.
There will be others who will almost certainly disagree with my setup, and that's fine. I encourage everyone to look at the methods on their merits, and come to their own conclusions. The system is flexible, and different methods will have benefits and drawbacks.
Step 1: What is Autodesk Vault?
Autodesk Vault is a data management solution that provides check in/check out capability, version control, plus enhanced search and copy capabilities. It works with Autodesk solutions such as Inventor, AutoCAD Electrical, and AutoCAD Mechanical (among others). As well as Microsoft Office formats, pdf, jpgs, etc.
Step 2: Where did I apply it?
My 'personal project' was started in my days at a previous employer, and was named 'Arduinna' after the Celtic goddess of the forest.
Hey, I'm a geek, which means I must have a code name for this project. This is important lest I suffer a loss of 'geek cred'.
It started back when I was taking woodworking classes at
Cerritos College, and designed my class projects in Inventor.

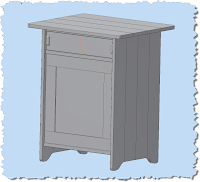
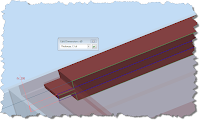
An End Table Design Similar to one I built in Class
(click to enlarge)
Ultimately, I decided I needed to track the data, and since Autodesk made a software that did just that, I decided to make use of it.
Step 3: How did I decided to go about it?
With an endeavor like this, you don't go running off without planning, no matter how tempting it is. So I sat back for a moment, and thought, what do I want to do to start planning this out? Here's the two biggest criteria that went into my decision:
1) My woodworking projects will be broken up by classifications that I chose, such as casework (such as bookcases and dressers), tables, accessories (small boxes, and such), as well as standard components (such as clamps for fixtures and screws).
2) I want to share these freely across all projects. Many components (such as drawers) can be reused across multiple projects with little or no modification. I want to make sure I maintain the maximum flexiblity to allow for this.
Everything else, at least in my case, was secondary.
So, as I started to setup my Vault, I setup my folder structure to look like this.

Folder Structure
(click to enlarge)
You'll see my project file in the top level. This is the only project file running all of the Arduinna project.
(pause to let everyone think about that)
That's right, only one project file runs everything.
For those of us familiar with Inventor, you may be saying to yourself, 'But Jon, you don't have one project! Each table, bookcase, or knick knack is a project!'
You'd be right, of course, but this is the difference between a
project, and a
project file. The project file just tells Inventor what folders it uses to search for files. It only segregates projects if we set it up to do so (by using multiple projects).
Recall how I said I wanted maximum flexibility to
share across my projects? Using one project file maximizes that flexibility. This is why I went that route. Using multiple project files makes this much harder to do, and means the user has to pay close attention to which project file they're using.
I like simple. And if I only have one option to choose from, my choices are easy.
There is a draw back to this single project approach. By using this method, it's strongly advised I use unique file names. In my case, I'm perfectly fine with that. As a matter of fact, I enforced it. So for me, it wasn't much of a drawback.
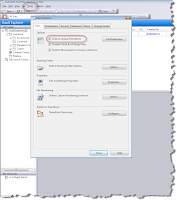
Enforced Unique File Names in Vault Explorer
(click to enlarge)
With that, my stage was set to get Project Arduinna off and running. Folder structure, and unique filenames set into place.
Next time, I'll talk a little more about how I set things up.
Happy Inventing as we start rolling into the holidays!

