In imagination, there's no limitation.
Mark Victor Hansen
Constraint limits have got to be one of the coolest things I've run across in Inventor so far.
In the past, when we've wanted to limit the range of motion for an assembly, we had Positional Representations, and Contact Sets to fill that roll.
Both tools work great, I use them, and I'll continue to use them in the future. For example, using the cylinder assembly below as an example.
Postional Representations are great for creating an 'extended or retracted' scenario, they couldn't let the assembly move between those extremes. Positional Representations can create snapshots in the motion.
Contact Sets, on the other hand, could allow an assembly to move between two positions, but the parts have to physically contact each other. So in our example, the piston inside the cylinder would have to hit the endcaps to stop. This might not be good for the life of the piston.
But now we have Constraint Limits! These set the limits on a constraint offset so the piston moves through it's motion, but I can define the offset in such away that piston doesn't hit the endcaps.
Here's a video showing the new tools!
So far, this is sizing up to be one of my favorite Inventor 2011 features!
Happy Inventing!
Friday, March 26, 2010
New for Autodesk Inventor 2011 - Constraint Limits
Thursday, March 25, 2010
What's New for Autodesk Inventor 2011 - Sketching!
“Never be afraid to try something new. Remember, amateurs built the ark. Professionals built the Titanic.”
There's a lot of new features inside of Inventor 2011. Definitely more than enough to shake a few of those proverbial sticks at.
Two of the new sketching features are dynamic input, and closing a profile.
Dynamic input is similar to the AutoCAD function, where you can type the size of a sketch entity as you create it. The big difference, is in Inventor, it will let you place the parametric dimensions as you go, instead of creating them once the sketch is finished off.
Definitely a potential time saver!
The other is one that is what I refer to as 'subtle but significant'. If you're creating a sketch, and you're ready to close the profile, you can now just right click, and choose 'Close'.
Just like that, the sketch closes! It doesn't have all the flash of those viewing tools, but it is a nice little day to day tool that I know I'm going to be using quite a bit!
And don't forget! The default option for subscription customers is to download the software. If you want to have a box sent to you, you have to opt in.
You can find instructions at the KETIV Technolgies Tech Tip section HERE
There's still more to come. There's so much to write about, it's hard to know where to start!
Happy Inventing!
Monday, March 22, 2010
Drawing Views from a Different Perspective.
The tragic or the humorous is a matter of perspective”
Arnold Beisser
As we look forward to spring, I like to throw one look back to the old tricks that sometimes become lost in the sea of 'bright and shiny' new tricks.
One of those, is change view orientation.
Occasionally, when creating a new drawing view, the standard views may not create the view we want.
In cases like this, you might think that we're stuck. But Inventor does have a way to create that view. That tool, is Change View Orientation.
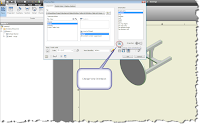 Here's the fix!
(click to enlarge)
When clicked, this button will open a window into Inventor's viewing window. which will let you use any of Inventor's viewing tools, such as the View Cube, View Face, and 3D Orbit to change the angle that you're viewing the file!
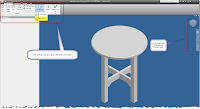
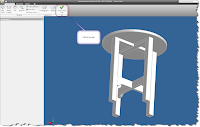
Hitting the 'Finish Custom View' button will commit the current viewing angle to the drawing, even if it doesn't line up with one of the 'standard' views.
c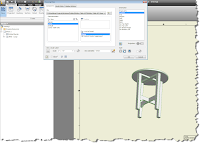
Also, if you choose perspective, you can place a perspective view on your drawing, versus the more common orthographic view. Perfect for those drawings that need a bit more of an artistic spin!
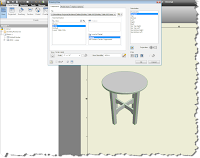 A perspective view.
Great for increasing the coefficient of 'Gee-Whiz'
when making a proposal.
(click to enlarge)
And that's it! A trick so simple, it's sometimes overlooked.
Happy Inventing everyone!

Hitting the 'Finish Custom View' button will commit the current viewing angle to the drawing, even if it doesn't line up with one of the 'standard' views.

Accept this.
(click to enlarge)
(click to enlarge)
c

To get this
(click to enlarge)
(click to enlarge)
Also, if you choose perspective, you can place a perspective view on your drawing, versus the more common orthographic view. Perfect for those drawings that need a bit more of an artistic spin!
 A perspective view.
 Great for increasing the coefficient of 'Gee-Whiz'
when making a proposal.
(click to enlarge)
Happy Inventing everyone!
Labels:
Inventor Drawings
Tuesday, March 16, 2010
Freeing Your Constraints! Showing Part Names in the Assembly Browser
Art in Nature is rhythmic and has a horror of constraint.
Robert Delaunay
There are days when you go into a situation, and find that there's something that's been there all along, and for a long time, you've never noticed it.
Today, i was in Inventor, and took a quick spin through the What's New in 2010.
And there it was. A tool that was added in Inventor 2010. A tool I probably saw and took note of. A tool that once I took note of it. I promptly forgot.
That tool is showing component names in your assembly browser.
This was a tool I could have used more than once. One that was avaialble to me. And one that I hadn't taken advantage of because my memory rivals that of your typical goldfish.
So without further adieu, here's a video on how to turn it on!
Labels:
Inventor Assembly Topics
Friday, March 05, 2010
Recycling Your Inventor Files - Copy Design in Vault
The purpose - where I start - is the idea of use. It is not recycling, it's reuse.
Issey Miyake
I'll confess that this is a bit of a 'redo' of a previous post. But the spammers had overrun that post, so like the cops busting up a party that's gotten out of hand, I had to delete that post and kick them out.
The good news? This one is one of the new videos that I've been creating, so it's definitely new and improved.
So here it is! Copy Design in Vault! Enjoy!
Labels:
Autodesk Data Management Topics
Monday, March 01, 2010
Shortcuts in Vault - A Road Often Missed
“I took the road less traveled by, and that has made all the difference.”
Robert Frost
Shortcuts in Autodesk Vault is a tool many times overlooked by all of us. For those of us using Vault for a while, it lacks the flashiness of a 'Copy Design' or 'Where Used' option.
But what it does have is the trusty reliability of a tool that makes life just a little easier, day in , day out.
And that's something that should never be taken for granted!
What is it about something as simple as a shortcut that makes it so wonderful?
Today, I'm going to start with a jig that many who've followed this blog have seen before.
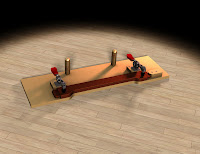
The good ol' jig, rendered in Autodesk Showcase
(click to enlarge)
(click to enlarge)
Naturally, I keep this project in Vault, but it's a few folders down, beneath the project that uses it.
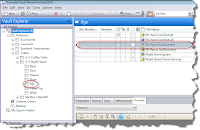 Digging down... down... down... down...
An inside joke for those who've listened to the B-52s.
(click to enlarge)
It's not a big deal to dig into the folders, whether browsing in Vault, or opening from Vault in Inventor.
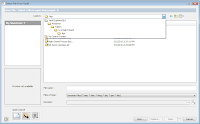
But it does have that 'nag factor'. Sometimes you click on the wrong folder and go down the wrong path. You might forget exactly which folder the file is in if you haven't been there in a while.
While it's true that Vault provides the tools that help you find the file, it also provides a tool that eliminates the need to have to go searching for the file.
That tool is a shortcut. And all you have to do is right click on the file or folder in either Vault Explorer, or the Open from Vault window in Inventor.
You'll be shown the option to create the folder.
And what does this do? You now have a shortcut in both Vault Explorer, and the Open from Vault tool in Inventor!
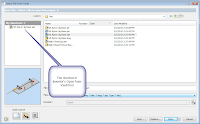
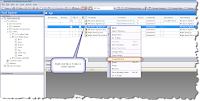
Now you can use the shortcut to jump right down to the file, instead of browsing through all those folders.
You can have as many shortcuts as you want, and if you right click on the shortcut in Inventor or in Vault, you can rename, or delete it completely, so you can always make sure you have easy to find shortcuts, and only the shortcuts you need.
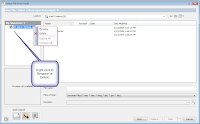
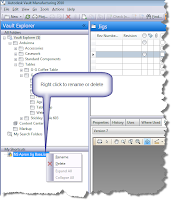 One more time, right click to edit inside Vault Explorer
(click to enlarge)

Open from Vault
(click to enlarge)
(click to enlarge)
But it does have that 'nag factor'. Sometimes you click on the wrong folder and go down the wrong path. You might forget exactly which folder the file is in if you haven't been there in a while.
While it's true that Vault provides the tools that help you find the file, it also provides a tool that eliminates the need to have to go searching for the file.
That tool is a shortcut. And all you have to do is right click on the file or folder in either Vault Explorer, or the Open from Vault window in Inventor.
You'll be shown the option to create the folder.
And what does this do? You now have a shortcut in both Vault Explorer, and the Open from Vault tool in Inventor!

The shortcut created in Inventor's 'Open from Vault' tool
(click to enlarge)
(click to enlarge)

The same shortcut created in Vault Explorer
(click to enlarge)
(click to enlarge)
Now you can use the shortcut to jump right down to the file, instead of browsing through all those folders.
You can have as many shortcuts as you want, and if you right click on the shortcut in Inventor or in Vault, you can rename, or delete it completely, so you can always make sure you have easy to find shortcuts, and only the shortcuts you need.

Right click to edit the shortcut in the Inventor Open from Vault screen
(click to enlarge)
(click to enlarge)
 One more time, right click to edit inside Vault Explorer
(click to enlarge)
And that's it. Like the rugged lineman that gives the quarterback time to find an open receiver, the shortcut tool is often overlooked and doesn't always get the credit, or utilization it deserves.
If you're using Vault, take a look at it. It can be a great addition to your box of tools!
If you're using Vault, take a look at it. It can be a great addition to your box of tools!
Monday, February 22, 2010
Vanishing Constriants, and 'What Gives?"
“There is no such thing as a failed experiment, only experiments with unexpected outcomes”
Richard Buckminster Fuller
Since Inventor R2010 has been introduced, I sometimes see this bout of 'unexpected behavior' pop up.
Have you ever created a sketch, watch the constraints seemingly place, but after completing the sketch, suddenly had your sketch move around again as if the constraints never existed?
It's almost always caused by the inadvertent turning off of constraint persistence. Fixing it is really simple.
Of course all you have to do is know where to look.
See the attached video for a fix.
Enjoy!
Labels:
General Inventor Topics
Wednesday, February 17, 2010
The Only Constant is Change - 3D Content that USED to Disappoint Me
This blog post is somewhat anecdotal, but also was the story of a lesson learned. By me.
I'm working on updating my Interoperability class from the Autodesk Manufacturing Academy, and was looking for some broken files in either IGES or STEP format that I could use as examples of how to stitch bad data.
First, I went to McMaster Carr. I remember using the 'big yellow book' in industry years ago. They had very few CAD downloads, and what they had was pretty ugly.
It was exactly what I was looking for, bad CAD files!
I had heard they'd improved their CAD files since those long past days. But how much could they really have improved it?
So off I go to McMaster's website, confident that I'll find some sort of IGES file in a dreadful format.
I quickly find an eyebolt with a CAD download button. They have several file types, most of which I can import. IGES is usually the one that gives me the most trouble, with STEP causing the occasional problem, so I try them both.
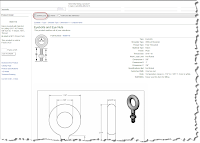
Screen capture of McMaster Carr's catalog
(click to enlarge)
The result makes my jaw drop. Both files import flawlessly. Even the troublesome IGES file stitches with minimal effort.(click to enlarge)
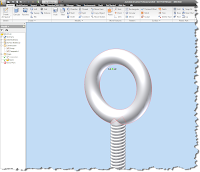
One eyebolt. Imported in seconds!
(click to enlarge)
(click to enlarge)
I try a couple more files. After all, this one has to be a fluke.
Sure enough. Flawless victory. All the files I try are usable with little or no effort.
Okay. I shake off the shock and go to plan 'B'.
Carr Lane. I hated their site back in the day. Surely their content is still awful!
They have a page that lets you search for CAD files by part number. I download a couple of STEP and IGES files from them.
All but one IGES file are just like McMaster Carr's. Perfect import.
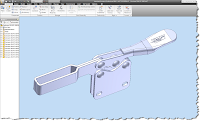
Imported, not a single hitch!
(click to enlarge)
(click to enlarge)
The one 'bad part' was an IGES file that wouldn't stitch because of bad surfaces in the Carr Lane logo. Unfortunately, it was such a mess that it would have taken way too long to fix.
But I'll give Carr Lane credit where they deserve it. The step version of this file was another perfect import. If I was using this in the real world, I'd have used that format instead. That's one of the reasons multiple formats are available. So I don't feel I can fairly ding them for that.
So what's the moral of my little story? There's actually two.
One: Vendors providing 3D files is becoming more and more common all the time. Vendors see that there's value in it, and that's good for the designers out there. If you plan on using the part from a vendor, check their site before you build your own version. They may already have a model of that component available for download. Save yourself the work!
Two: Websites change and get updated. I used to poke fun at the Carr Lane website to the point where I'm sure some poor content developers ears burned incessantly.
But I have take my mockery of their site and put it in the archives now. While nobody from Carr Lane called me. they along with companies like McMaster Carr, have obviously been listening to their customers, and forced me to eat a little crow.
The websites are vastly improved over what they've been in the past.
Learn from my mistakes. Just because the site was underwhelming the first time you checked, doesn't mean it hasn't gone through some improvements since them.
Give them a double check from time to time, and ask around. Things change, and you might be missing something!
I sure did!
Monday, February 15, 2010
What You Associate Yourself With - Associating a Sketch to A Drawing View
Video Killed the Radio Star
The Buggles
I spent a big part of my weekend fighting a cold, so I wasn't feeling up to blogging (why is it we get sick on the WEEKEND?!?).
But, here's a video I created for the KETIV Tech Tips section on the KETIV website.
Check it out here. I hope you enjoy it!
And look for me at the AUGI CAD Camp in San Diego! I get to attend this year, and I'm really excited about it!
Labels:
General Inventor Topics,
Inventor Drawings
Friday, February 12, 2010
Pacific Design and Manufacturing Show - The End
Final thoughts are so, you know, final. Let's call them closing words.
Craig Armstrong
Yesterday, the 2010 the Pacific Design and Manufacturing show drew to a close.
The show was good, but I w0uld definitely say that, I felt a different 'vibe' this year. At least that's my humble opinion.
In 2008, everything was good. The economy was growing, and everyone was riding the crest of the wave.
In 2009, the economy was slumping, and it seeme, everyone attending the show looked like they'd had to put their favorite pet to sleep that morning. It was more than a little disheartening.
Now in 2010, the energy appears to be coming back a bit. Granted, it wasn't at the 2008 levels, but it was better. Everyone seemed more upbeat and things were happening again.
Hopefully, these are signs of things to come!
Traffic at the Autodesk booth was solid. There was a lot of interest, I know that I answered a lot of questions on Autodesk Showcase, Autodesk Inventor, Autodesk Labs, and my 3DConnexion Space Pilot.
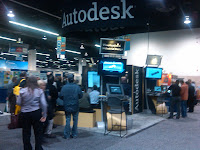
Working for a Living
Demo at the Autodesk Booth
(click to enlarge)
Demo at the Autodesk Booth
(click to enlarge)
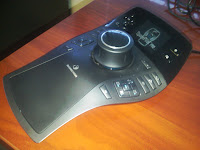
My SpacePilot Pro. Autodesk was giving one away!
But not THIS one.
It's mine. My preciousssss.
(click to enlarge)
But not THIS one.
It's mine. My preciousssss.
(click to enlarge)
As for the cool stuff. It's always hard to run around at the show, simply because of my responsibilities at the Autodesk booth.
But I've always been a fan of the Rapid Prototyping companies, since the technology flat out amazes me. I used to work for a company that had one. It still fascinates me.
Objet and Purple Platypus (the local Objet reseller) were there, showing their tech. It amazes me that the tolerances on these machines are getting down into the fourth decimal now.
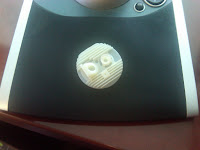 A sample Object part
It's the head off an RC engine
(click to enlarge)
 Josh Murray at the Purple Platypus booth
(click to enlarge)

The Objet booth
(click to enlarge)
Back when I was in industry, our old SLA machine could only get to about .005 inches on a really good day!
Quickparts was there, just like they have been for the last 5 years I've been going myself. This is a service bureau I wish I'd known about when I was in industry! Not only can they make rapid prototyped parts, they can do it with a ton of different processes too!
I didn't get a chance to snap a picture of the booth, but they did give me a cool Rubik's cube, good for one trip down 80's memory lane!
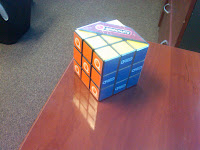
I never could solve these things.
(click to enlarge)
(click to enlarge)
Finally, I spoke with the team at Protomold, who specialize in quickly creating short run molds and machine parts.
I got the cool 'box' I call it. It's a clever little plastic box that shows some common good and not-so-good practices with creating plastic parts.
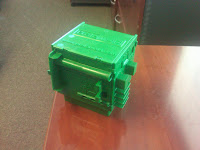
The Protomold 'box'.
You can request one from the Protomold website.
(click to enlarge)
You can request one from the Protomold website.
(click to enlarge)
Those are the highlights, at least for now!
The show was fun, educational, and a little tiring too. I'll definitely be catching up on some sleep this weekend!
Labels:
General Inventor Topics
Tuesday, February 09, 2010
Pacific Design and Manufacturing Show - Day 1
“Laughter and tears are both responses to frustration and exhaustion . . . . I myself prefer to laugh, since there is less cleaning up to do afterward.”
Kurt Vonnegut, Jr
The good news, I was able to get some material put together. The bad news. I found out I had the wrong data set for my presentation tomorrow. So, I'm cramming the new data set, and reliving my college days.
Trust me. The memories of those late nights in school are way better than the reality today.
But I didn't want to leave blog-o-sphere short of an update.
Here's a video I shot of some of the Fanuc robots doing their thing.
Sorry, the video is raw, so you'll have to forgive the people walking in front of the camera. I'm afraid I didn't get a chance to edit them!
In any case. Here it is! More to come tomorrow, if I'm not prepping something else!
Labels:
General Inventor Topics
Monday, February 08, 2010
Off to PDMS I go! The Pacific Design and Manufacturing Show
Great is the road I climb, but the garland offered by an easier effort is not worth the gathering”
Propertius
Tomorrow I head off to walk the Pacific Design and Manufacturing Show in Anaheim. I've decided to try a couple of new things this year. I've linked my Twitter account to my blog (see the bottom of the page), and I'm going to carry my trusty Blackberry (for mobile updates) and my aging Kodak digital camera.
My plan is to post some mobile updates from the show. It's a new thing for me, so we'll see how it goes.
Ideally, look for some updates as I check out some cool tech tomrrow!
At worst, look for the blog explaining why I won't do this again. :-)
I'm definitely hoping for the first result.
Wednesday and Thurday, you'll find me working the Autodesk team at the booth. If you get a chance and find yourself at the show. Swing by booth and say 3609 hi!
Labels:
General Inventor Topics
Wednesday, February 03, 2010
Whats Wrong with My Environment? - Part 2
“Nothing helps scenery like ham and eggs.”
Mark Twain
As promised. Here's part 2 of creating an environment inside of Autodesk Showcase. What's the biggest lesson I've learned so far? There's a TON still left to learn!
But that doesn't mean I can't share what I've learned so far.
So in the last Showcase blog post, I talked about where to get environments. Now, what to do once we have them.
So first, I've downloaded a *.hdr image from the Alias Design website. In this case, I've grabbed the 'Daylit Gypsumcrater' *file. You'll find them in 'Environments' under the 'Downloads section.
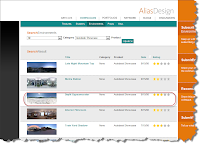
First, the Image
(click to enlarge)
(click to enlarge)
Once downloaded, now we switch gears and jump into Showcase. First, we get our scene open.
But, today it's about creating a new environment, so now, we have to go to the 'Scene' pulldown, and activate our Environments menu.
Now. click the 'Create' button to load up our environment
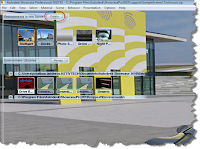
Now, we bring in our *.hdr file. Shown in the screen capture below.

Now we can finally adjust our Environment. There's a lot going on here, and yes, I'm definitely still learning a lot here myself. I can say that I've adjusted exposure most often, since this adjust how bright an environment will appear.
If your not sure, just take the defaults go from there. You can always go back and adjust!
The Help button is definitely your friend for reference. I'll definitely post more tricks as I learn.

Once you've made your adjustments, hit create, and Showcase will crank for a bit as it creates the environment.
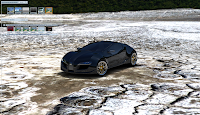
So these are the steps to create the environment. You'll even notice the new button (named 'Generic' by default) attached to the environments tree.
Of course, there's a good chance you may want to go back and make adjustments. In this case, right click on the newly created environment and choose properties.
There's a lot going in here as well, so for this part, I've shown two common areas that I change. First, is the name. The second, is the shape of the dome. The dome shape can affect the look of the environment. I definitely suggest trying different dome shapes to get the best one. This will vary based on how the *.hdr file is used.

One last note. Right click on the new environment, and you can save it to your library. This makes it available for future scenes, and saves you the trouble of having to repeat these steps unnecessarily!
Whew! There's a lot going on, and I didn't go into all the details. But it's definitely a start. And as I start learning more, I'll start posting the tricks!
As for what's next? I'll be at the Pacific Design and Manufacturing Show in Anaheim next week helping out at the Autodesk booth. So if you're at the show, come by booth 3609 and say hi!
But, today it's about creating a new environment, so now, we have to go to the 'Scene' pulldown, and activate our Environments menu.
Now. click the 'Create' button to load up our environment

Finally, the Fun Part!
(Click to Enlarge)
(Click to Enlarge)
Showcase will ask you if this is a Backplate Environment(a flat environment) or a Geometric Environment (a 3D Environment). In this case, I'm using a Geometric Environment.
Now, we bring in our *.hdr file. Shown in the screen capture below.

(Click to Enlarge)
Now we can finally adjust our Environment. There's a lot going on here, and yes, I'm definitely still learning a lot here myself. I can say that I've adjusted exposure most often, since this adjust how bright an environment will appear.
If your not sure, just take the defaults go from there. You can always go back and adjust!
The Help button is definitely your friend for reference. I'll definitely post more tricks as I learn.

The Create Environment Adjustment screen
(Click to Enlarge)
(Click to Enlarge)
Once you've made your adjustments, hit create, and Showcase will crank for a bit as it creates the environment.

The Car in a Whole New World
(click to enlarge)
(click to enlarge)
So these are the steps to create the environment. You'll even notice the new button (named 'Generic' by default) attached to the environments tree.
Of course, there's a good chance you may want to go back and make adjustments. In this case, right click on the newly created environment and choose properties.
There's a lot going in here as well, so for this part, I've shown two common areas that I change. First, is the name. The second, is the shape of the dome. The dome shape can affect the look of the environment. I definitely suggest trying different dome shapes to get the best one. This will vary based on how the *.hdr file is used.

Even MORE Adjustments You Can Make!
(Click to Enlarge)
(Click to Enlarge)
Finally, the result!
One last note. Right click on the new environment, and you can save it to your library. This makes it available for future scenes, and saves you the trouble of having to repeat these steps unnecessarily!
Whew! There's a lot going on, and I didn't go into all the details. But it's definitely a start. And as I start learning more, I'll start posting the tricks!
As for what's next? I'll be at the Pacific Design and Manufacturing Show in Anaheim next week helping out at the Autodesk booth. So if you're at the show, come by booth 3609 and say hi!
Labels:
Autodesk Showcase
Monday, February 01, 2010
What Wrong with My Environment?!? - Autodesk Showcase
“One of the Internet's strengths is its ability to help consumers find the right needle in a digital haystack of data.”
Jared Sandberg
If you've been paying attention, I've not been as good about Sunday night blogging. This week is no exception. I spent my Saturday at Planes of Fame being a volunteer museum guide.

Planes of Fame's two P-51 Mustangs. They both flew Saturday.
There's nothing quite like the sound of a Merlin engine purring.
(click to enlarge)

There's nothing quite like the sound of a Merlin engine purring.
(click to enlarge)
Sunday, I hiked to the vernal pools in Murrieta, which only fill with water during the rains.

Unfortunately, due to teh conditions, we couldn't get much closer.
(Click to enlarge)
One thing is for sure, I don't have the complete, definitive list. But here's some places that I've either had recommended to me, or I've used personally.(Click to enlarge)
Needless to say, Sunday night, I was more about an early bedtime then a blog post. But, at last, here we go!
Today, I'm going to talk about environments in Autodesk Showcase.
Environments in Showcase are something I've not worked with for one reason and one reason only.
I've never gotten around to it. (I say this with a sheepish grin).
But twice last week, I was asked by two different users where to find environments, and how to bring them in.
Granted, this isn't the first time it's come up. But I finally told myself that I was going to take the opportunity to blog this information.
So first of all, what is an environment?
An environment is, essentially, the scenery behind your model. For example, if the P-51s in the picture above were the models I was showing, the hangar and airfield could be considered my environment.
The environment is made of a High Dynamic Range image (HDR), which can be either flat (called a backplate) or three dimensional (such as cylindrical or spherical).
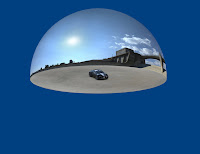
So now that we know WHAT an environment is, where can I get some.
There are some that are included with Showcase, and those can get you pretty far, but you also may reach a point where you'd like a few more options.
Today, I'm going to talk about environments in Autodesk Showcase.
Environments in Showcase are something I've not worked with for one reason and one reason only.
I've never gotten around to it. (I say this with a sheepish grin).
But twice last week, I was asked by two different users where to find environments, and how to bring them in.
Granted, this isn't the first time it's come up. But I finally told myself that I was going to take the opportunity to blog this information.
So first of all, what is an environment?
An environment is, essentially, the scenery behind your model. For example, if the P-51s in the picture above were the models I was showing, the hangar and airfield could be considered my environment.
The environment is made of a High Dynamic Range image (HDR), which can be either flat (called a backplate) or three dimensional (such as cylindrical or spherical).

An example of the same car, showing the extents of it's environment.
(click to enlarge)
(click to enlarge)
So now that we know WHAT an environment is, where can I get some.
There are some that are included with Showcase, and those can get you pretty far, but you also may reach a point where you'd like a few more options.
Alias Design - Registration is free, and they have a nice selection of free environments that you can download. The environments are also free.
HDR Mill - They have a small free sample section, and you can purchase images from HDR Mill at fairly reasonable prices. I've used them before, and liked the results. If I was in the market for some new environments, I'd definitely consider them.
Dosch Design - One big disclaimer, I've not used this personally, so I don't feel I can truly recommend them. At about $150 USD for around 30 images. They're a bit rich for my blood, since I just haven't run into a place where I need that many environments. But that being said. I have seen them recommended consistently by several users, and several sites. So I went ahead and gave them a shout out.
With that being said, should I want to have an arsenal of environments at my disposal, I would be willing to try them, based on the recommendations I've received.
So there's where to get some environments. Importing them into Showcase is not that difficult, but there are always tricks.
Don't worry, I'm not going to abandon you. My next post will be taking an environment, and importing it into Showcase.
But for now, back to my Monday!
Labels:
Autodesk Showcase
Friday, January 29, 2010
Stranger in a Strange Land - The Journey Continues
“Let your mind start a journey thru a strange new world. Leave all thoughts of the world you knew before. Let your soul take you where you long to be...Close your eyes let your spirit start to soar, and you'll live as you've never lived before.”
Erich Fromm
Last night, I once again made the sojourn to the South Coast Revit User group.
Once again, this meant that I was a stranger in a strange land. But as always, the members of the user group were more than welcoming.
Speaking that Thursday night, was Will Harris of WILL2PLAY.
He gave an excellent presentation about how Autodesk Revit was used to design an addition to a Gothic church.
And while the technical achievement was incredible, what I found much more fascinating was his talk on the actual implementation process itself.
He spoke about a lot of the challenges it takes to perform an implementation, starting with the fact that a Gothic church is probably the toughest project to start with. He continued into the constant, ongoing challenges of developing and maintaining the standards, and finished with the fact that he bought a lot of lunches as he got acquainted with the team he was working with.
And, while Revit was a worthy feather in Will's hat, the things that struck me weren't necessarily the technical aspects.
So, while some of the biggest things I learned (and having forgotten a few things, relearned) weren't the button clicks, what were they?
Always have a backup plan
Mistakes are made, things go wrong in spite of the best efforts of the team. Make sure you have back up plans and procedures just in case. For Will's experience, he talked about having to restore standards that were accidentally overwritten. A good backup plan meant restoring it in a few minutes instead of several hours.
The technology is cool, but without people, it's just a box
All the software in the world can't help you if you don't have people motivated to learn the software and implement it. And that doesn't mean you fire your team and replace them with new hires. It means learning what makes your team tick, finding a way to give them direction, motivating them, and making them want to achieve the goals.
What I took away...
So those were the big lessons from Mr. Will Harris. We all love the tech. I wouldn't blog if it weren't for the fun tech I get to blog about.
But there's more than the tech. Once the network license is running, the integrations are tested, and the updates installed. There's the trials and tribulations of the real world.
If we lose sight of that, we're forgetting a huge part of the picture.
Thanks for the presentation, Will!
Labels:
Humor in Technology,
Interoperabilty
Wednesday, January 27, 2010
The Changing Image of What Is - Preview Pictures in Autodesk Vault.
To finish a work? To finish a picture? What nonsense! To finish it means to be through with it, to kill it, to rid it of its soul, to give it its final blow the coup de grace for the painter as well as for the picture.
Pablo Picasso
While training a class on Autodesk Vault, I inadvertently used a trick that's become second nature to me.
Then someone asks, "How'd you do that?!?"
I had to think a second. The 'trick' is really just a single button click that's become habit.
Here's the issue I've run into, and how I solved it.
Sometimes, when you're working with Vault, you may find that you click on the preview tab in Vault Explorer, and you don't get a preview. It seems to happen after a renaming, or moving a file in Vault.
I'd love to say that, like Prometheus bringing the gift of fire, I had some miraculous bit of wisdom to bestow that I'd discovered after some great search.
But alas, I learned this trick reading a tech document one night. So really what I've done is provided proof that my life can be rather dull at times.
But the small tip that I do have is that you can hit the 'Update' button in the preview pane of Vault Explorer, and regenerate the view.
Once you click the update button, the preview will regenerate (it may take a minute or two), but you'll be back on your way with your preview window intact and functioning!
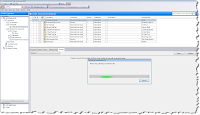
The View in the Process of Updating
(click to enlarge)
(click to enlarge)
And your preview is back!
So that's it. Another little Vault trick!
Happy Inventing!
Labels:
Autodesk Data Management Topics
Subscribe to:
Posts (Atom)


