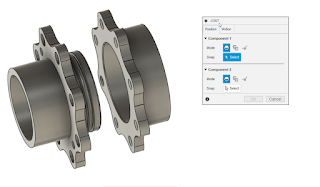
One thing using 3D CAD programs has taught me, programs like these can make assembling parts together a piece of cake! With just a few clicks, parts can be quickly placed into position.

3D CAD systems have many ways of assembling components
But just because a constraints allow us to easily assemble and disassemble parts, doesn't mean that it will be so easy to do on the assembly line, or during maintenance.
One example is a seal, such as a gasket or packing that locks the two mating parts together. For example, in the image below, the O-ring creating the seal may cause enough friction to prevent the flanges from being easily separated.
 |
| The O-ring sealing the components could be enough to "friction lock" the assembly, making it difficult to take apart. |
One option would be taking a screwdriver or another prying device between the flanges and pry like you're opening a casket of pirate treasure. But while a tempting option, wedging a prybar between the flanges could result in damage to the flanges. If the flanges are made of a soft material, such as aluminum, the odds of damaging the parts goes up significantly.
But the designers of old did come up with a more elegant way of separating these... sticky problems.
Many times, assemblies such as these will have tapped holes that appear to go nowhere. They don't have a corresponding hole in any mating part. They just appear to.... be there.
Why were these holes put there? They do have a purpose!
That's because they aren't there for the purpose of assembling parts. They're for disassembling parts.
They're called "jacking holes". By carefully threading screws into these holes, the two flanges can be pushed apart evenly without damaging the parts making up the assembly.
 |
| Using a socket head cap screw to separate the flanges. |
It's a simple, and elegant way of solving a challenge.
So if you should find yourself having to disassemble an assembly similar to what I've shown here, look for those jacking holes and see if it can make your life easier.
And if you find yourself designing a component that may present a challenge, perhaps adding a couple of jacking holes might make for a design that's easier to disassemble when the need arises!
 |
| Opposing jacking screws help separate the flanges evenly! |
About the Author:
Jonathan Landeros is a degreed Mechanical Engineer and certified Aircraft Maintenance Techncian. He designs in Autodesk Inventor, Siemens NX, at work, and Autodesk Fusion 360 for home projects.
For fun he cycles, snowboards, and turns wrenches on aircraft.
Standard Parts Used on this Project
A569-343 Viton O-ring - McMaster Carr Part Number 9464K173
Buna-N -343 Backup Ring - McMaster Carr Part Number 5288T372
1/2-13 x .500 Long Socket Head Cap Screw - McMaster Carr Part Number 92185A712

