So far, so good!
One thing I've been trying is making different parts, some of which have been sheet metal.
One thing I've been trying is making different parts, some of which have been sheet metal.
I've got ribs that will support a sheet metal. The component is an aircraft trim tab. There are two ribs at each end of the tab.
The sheet metal forming the tab will wrap around the ribs and attached via rivets. That means that the sheet metal will be following the ribs, so why not reuse that geometry instead of trying to recreating with a lot of "measuring and calculating".
The first thing to do is to assemble the ribs in their final position and orientation.
The next step is to create a new component in the Fusion assembly and activate it. Select it as a sheet metal part and set your sheet metal rules.
If your not sure about creating sheet metal rules, my previous post here may help.
The sheet metal forming the tab will wrap around the ribs and attached via rivets. That means that the sheet metal will be following the ribs, so why not reuse that geometry instead of trying to recreating with a lot of "measuring and calculating".
The first thing to do is to assemble the ribs in their final position and orientation.
 |
| The ribs place and oriented, ready for sheet metal. |
If your not sure about creating sheet metal rules, my previous post here may help.
 |
| Create a new component |
Now, create a sketch, and being projecting geometry from the existing parts.
Now project the geometry that will be used to help define the new part. I'd recommend making it construction geometry to make sure it doesn't accidentally add itself to your part.
 |
| Creating construction geometry to build a part. |
Now sketch out the profile required. In this case, it's the shape of the sheet metal part.
 |
| Projected geometry to form the sheet metal profile. |
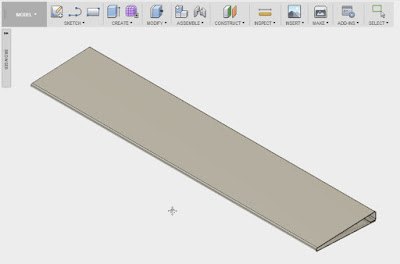
 |
| The sheet metal part extruded. |
Now continue the process of defining the part. This includes other features, such as extrusions and holes.
 |
| Additional features can be created by projecting from another part. |
Give it a try, it can make creating another part much easier than transitioning measurements!
Bonus tip!
Change your part opacity by right clicking on a component and choosing "Opacity Control". You can make the part semi-transparent and make it easier to see underlying geometry!
 |
| Try changing Opacity to make selecting through parts easier. |
Acknowledgements:
Trim tab created from drawings accessed via my subscription to Air Corps Library.


No comments:
Post a Comment