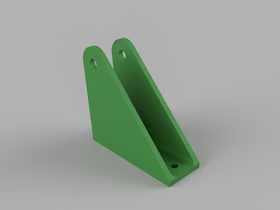
A project I've been working on, "here and there" has been a series of AS5174 hydraulic fittings.
Original created in Inventor they were imported into Fusion 360 and added the gallery here.
They're samples I've opted to share in the event anyone can use them out there.
If they help you, let me know!
Have fun!
Pages
▼
Sunday, July 30, 2017
Sunday, July 23, 2017
Using Attach Canvas in Fusion 360 to Find an Unknown Measurement
For the last few weeks, on my spare time, I've been creating models from scanned prints in Fusion 360.
Most of these prints are produced in the 1940s, and they border on artwork. When an drafter nearly
80 years ago could accomplish with pen and paper was impressive. They were certainly masters of their
craft! You can see a sample of a similar drawing here.
 |
| How can you find the missing dimension? |
dimensions.
In some cases, the missing dimension was a result of a drafting error, in most cases, the dimension
was referenced on a different drawing that was unavailable to me.
But it doesn't matter how the dimensions ended up missing, if they can't be found or derived. Without the missing dimension, creating a model from the drawing becomes much more challenging.
Fortunately Fusion 360 has a nice tool that makes finding this dimensions pretty simple, as long as
you have a single dimension, and the drawing is consistently scaled.
How do you do it? Here's how I was able to figure out what that phantom dimension.
Convert your drawing into an image file, a *.png, *.jpg, *.jpeg, and *.tif are all formats you can
use.
Now this image can be imported using the "Attached Canvas". icon.
Fusion 360 will want to know which plane you want to place the image on, and will also want you to browse for the image you want to insert.
Once an image and a plane are selected, you'll have an opportunity to scale the image, using either the handles or in the dialog box. You can scale it here, but there's a step coming up where it'll be easier to scale the image accurately. In my case, I used this yet to be seen step.
The drawing will import onto the Fusion 360 canvas, but it's not calibrated. It's up to us to make sure the scale of the drawing is 1:1. .
I recommend re-positioning the attached image easier to measure. Once that's done, locate the "Canvases" folder in the browser. Right click on it, and choose "Calibrate".
This step gives you the opportunity to measure a known value on the Attached Canvas.
Returning back to the situation I found myself in, The drawing I was reproducing had edges I with dimensions I could use, so I just picked an edge with a dimension, and chose the extents of the dimension for scale.
In the case of my drawing, the dimension I chose was 5 inches. Naturally, the calibration the dimension on my canvas, but trust me! It's 5 inches!
The image will resize according to that known dimension, and if the drawing with a consistent scale, measurements can be taken from any part of the drawing and a reasonably accurate measurement can be made.
By using this method, the dimensions of the part can be obtained from the drawing, and the drawing turned into a 3D model.
But of course, it's not all a walk in the park. There are some things to be aware of going in.
 You've already seen me use the phrase "consistently scaled". In other words, the drawing has to be created to some sort of accurate scale. If it's sketched to different scales in the X and Y axis, it will be difficult, possibly impossible, to get good dimensions.
I've also used the phrase "reasonably accurate". That means you can't quite get to the last decimal point of your measurement. But you can get close enough to determine many measurements.
For example, if you measure .193 on a part that can be expected to be a standard thickness, then you might be looking at a thickness of .1875 inches.
But even if not perfect, this method can get you exactly what you need when no other methods work.
So give it a try!
Now this image can be imported using the "Attached Canvas". icon.
Fusion 360 will want to know which plane you want to place the image on, and will also want you to browse for the image you want to insert.
Once an image and a plane are selected, you'll have an opportunity to scale the image, using either the handles or in the dialog box. You can scale it here, but there's a step coming up where it'll be easier to scale the image accurately. In my case, I used this yet to be seen step.
 |
| The Attached Canvas Preview |
I recommend re-positioning the attached image easier to measure. Once that's done, locate the "Canvases" folder in the browser. Right click on it, and choose "Calibrate".
This step gives you the opportunity to measure a known value on the Attached Canvas.
 |
| Choosing the calibrate option will allow you size the imported image. |
In the case of my drawing, the dimension I chose was 5 inches. Naturally, the calibration the dimension on my canvas, but trust me! It's 5 inches!
 |
| Calibrating the image using a known edge. |
 |
| A measurement taken to obtain the part thickness |
But of course, it's not all a walk in the park. There are some things to be aware of going in.
 You've already seen me use the phrase "consistently scaled". In other words, the drawing has to be created to some sort of accurate scale. If it's sketched to different scales in the X and Y axis, it will be difficult, possibly impossible, to get good dimensions.
 I've also used the phrase "reasonably accurate". That means you can't quite get to the last decimal point of your measurement. But you can get close enough to determine many measurements.
For example, if you measure .193 on a part that can be expected to be a standard thickness, then you might be looking at a thickness of .1875 inches.
But even if not perfect, this method can get you exactly what you need when no other methods work.
So give it a try!
Sunday, July 09, 2017
Making a "Port Tool" in Fusion 360
 |
| The finished housing |
Many of my challenges were learning to use Fusion 360, partially because it's a tool I'm still new to, and there are different ways to do things in Fusion.
But the challenge I'm going to focus on is more one of process, than one of creating shapes in Fusion
 |
| The ports where fittings attach |
They're all based on the AND-10050 standard. That means that the ports are similar. And when I say similar, I mean they're all similar geometry, varying only by size.
Take away the dimensions, and they're the exact same shape
I also recalled that there are special tools for drilling these ports.
In other words, where things can be standardized, they are as standardized as possible
So why do the same thing in Fusion?
We'll, here's how I did it, at least in brief.
First, create a new part in Fusion, locate the parameters, and entered the dimensions from the table found in the standard into the User Parameters section.
 |
| The user parameters |
 |
| The cross section for the "port tool". |
It's interesting, at least I think, to point out that the finished "port tool" is a solid. But I'll use this to remove material from the base casting that will be receiving the port I need.
 |
| The port tool, as a solid. |
First of all, I had a tool that was easily reusable and repeatable across as many places, and designs as I needed.
Second, since the AND-10050 port comes in multiple sizes, I could copy the port, change those user
parameters that I created earlier, and create a new port in a matter of minutes.
 |
| Inserting into the current design |
I effectively created a "template" for the port that I would use as a standard design feature.
Those benefits alone were enough to get me to bite on this method.
Now, all that was left to do was to open the design that needed the port, and insert the solid.
With a little magic from the move and combine command, I was able to subtract the port tool from the casting I needed, and end up with the right port.
But I'll save that one for a post a little later.
I hope this port helped, and if you have any tips on how you've tackled a similar challenge, feel free to leave a comment!
 |
| Inserting and moving the solid |
Good luck!
Acknowledgements.
The print I used to create this valve body was provided via my subscription to AirCorps Library. Thanks for the awesome work preserving vintage aircraft drawings!
