
Carl Sandburg
As I'm waiting for 2013 to arrive, I came across a little tip in Autodesk Inventor that it could be said falls into the "I never noticed that" section.
Splitting a hole table.
Once upon a time, when I was designing stamping dies, there were many a time that the hole table describing all the holes in a die plate would run off the page.
Back at that time, I was using AutoCAD, so breaking was a matter of inserting and manually populating blocks.
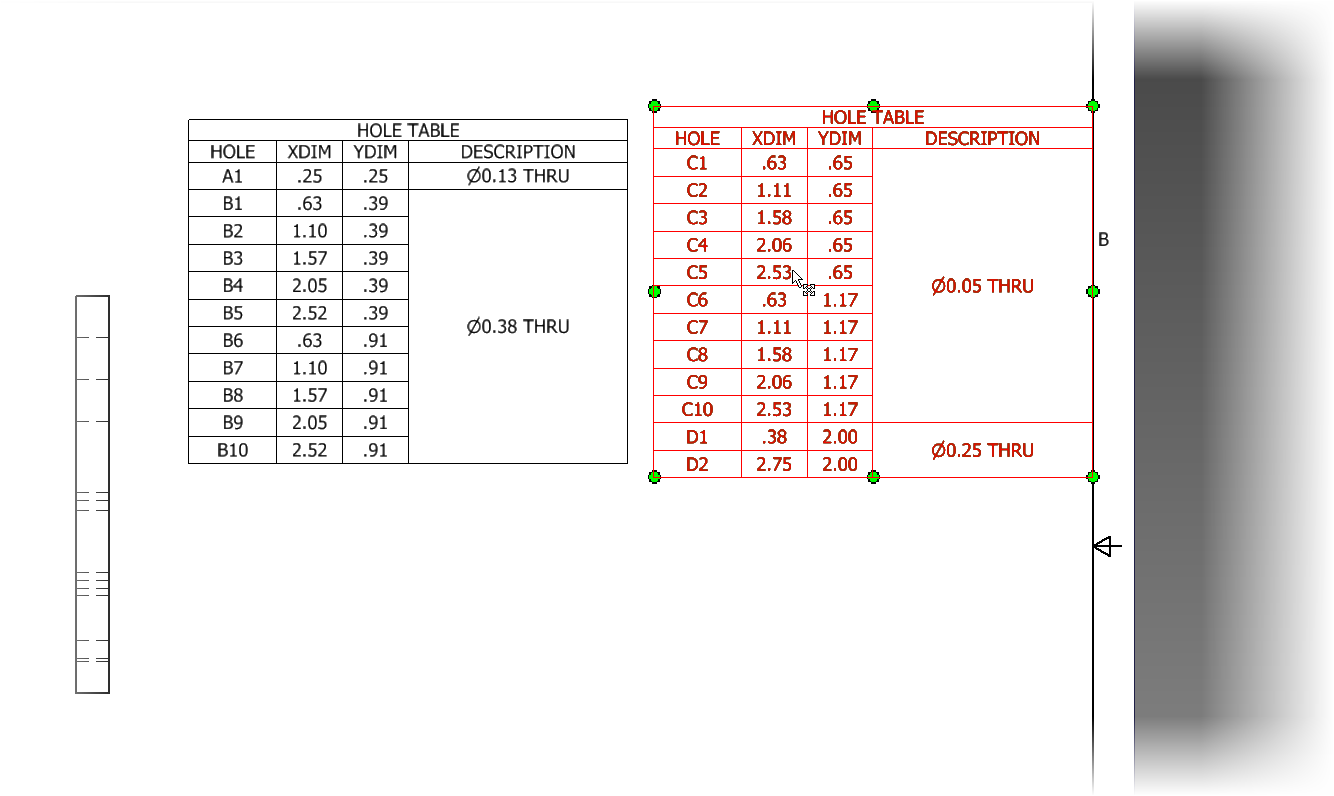
But what happens if the same thing needs to be done with Inventor? Below is an example of a hole table I want to split. I know the table isn't that long, and probably doesn't need to be split in this case, but bear with me, it's just an example! Besides, I didn't feel like modeling a part that did run off the page!
 |
| A table in need of splitting |
Let's say I want to split the table at the row 'C1'. All I have to do is right click inside one of the fields, and choose "Table>Split Table".
 |
| Splitting the table. Make sure to click inside one of the fields |
 |
| Repositioning the newly split table. |
That's all there is to it! But there's a couple of other tips worth knowing.
1) If the table needs to be "recombined", right click on the table, and choose Table>Un-Split Table
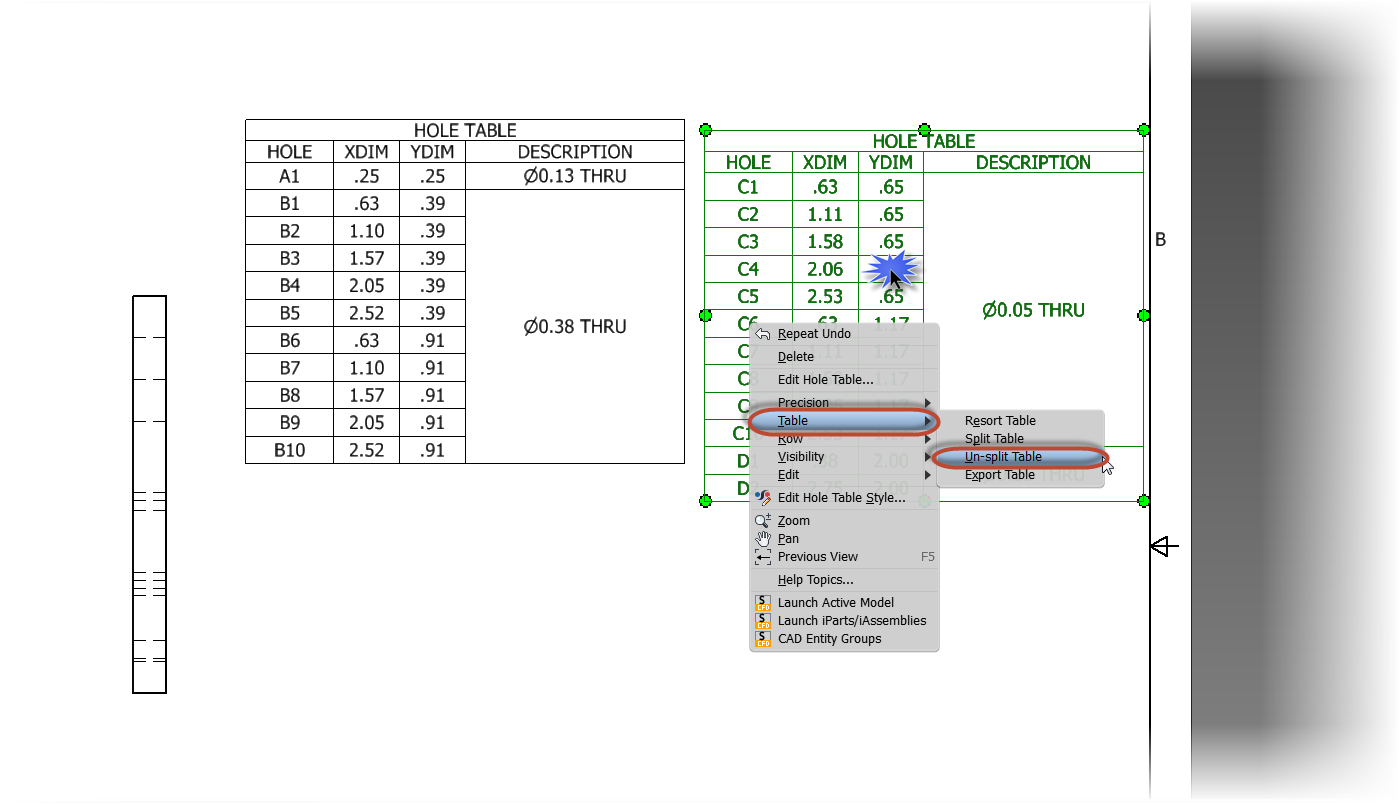 |
| Combining a "un-splitting" a split table. |
2) This is very important! Don't click on the border of the cell! The "Split Table" option will gray out if the border of the cell is clicked on!
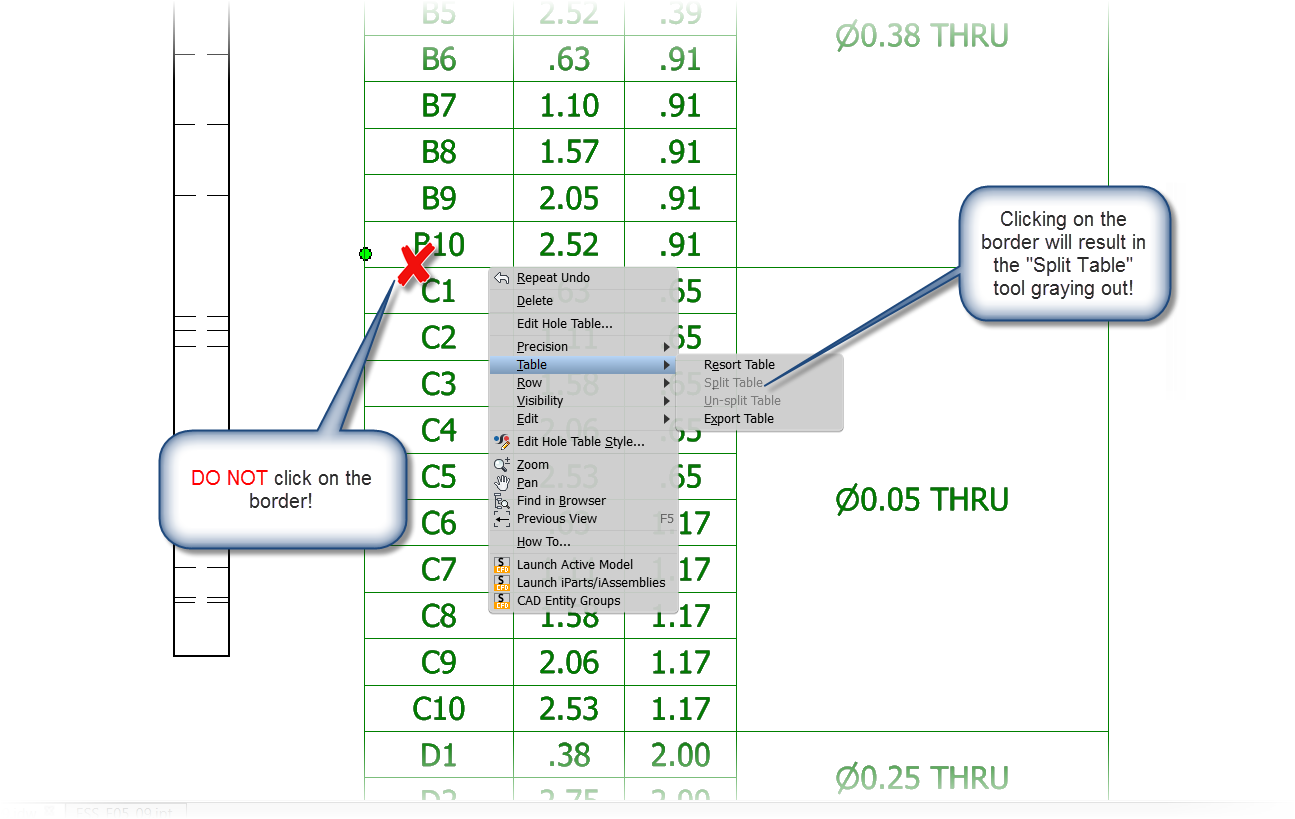 |
| This is what happens when clicking on the border of a cell! |
Have a few thoughts you want to share? Feel free to drop a comment or two!
Good one Jonathan!
ReplyDeleteThanks! :)
DeleteVery Helpful....
ReplyDelete