It's been a very unique experience, mostly because it's been entirely brand new.
For those of us who aren't familiar with iLogic, picture being able to enforce rules and automate with simple lines of code. It's a way of capturing knowledge that extends beyond the dimensions and constraints of the model.
As I've been practicing, I created a quick example.
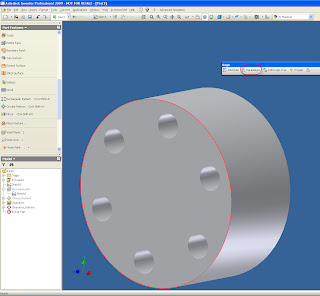
I just built a small part with threaded holes, and a matching pattern. I'm going to write some iLogic code that alternates suppressing the threaded and clearance holes together. However, we'll change it by selecting a pulldown from the iLogic parameters screen.
Here's our starting point. If you click on the picture, you can see the clearance and threaded holes (I renamed the features. This will help me in writing the code later).
 First, click on the 'Parameters' button on the iLogic toolbar.
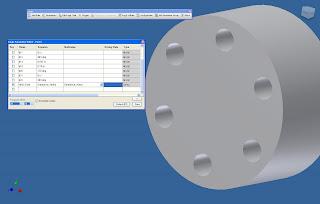
This is what the Parameters screen will look like initially.
Create a parameter named Hole_Type, use the pulldown (circled) to make the parameter a string, check the 'Key' check box, and finally, right click and choose 'Multi-Value' (this makes the parameter a list of selections).
Once the parameter is set to 'Multi-Value', a second parameter comes up. Type in the Clearance_Holes, and Threaded_Holes into the screen and click 'Add'. You can type as many entries as you need, but for the sake of simplicity, I'm only using two.
I hit 'OK', and the box closes. We'll use this later. Now I click on 'Add Rule'. I chose to name mine 'Hole Suppression'. Hit 'OK' to close this particular rule.
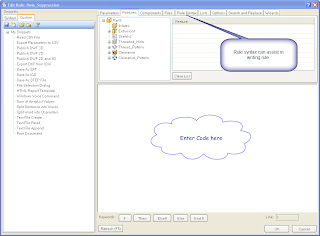
Now, we get down to the real business of iLogic, writing the code that controls the features. The code is written in the area indicated, and the 'Rules Syntax' tab provides a wizard to help you with the syntax of the commands.
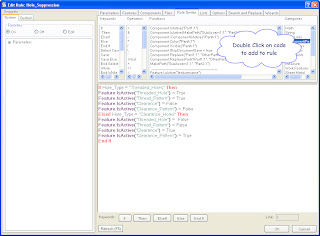
Here's a the code I created. You can type it, double click on code in the 'Rules Syntax' area, use the buttons at the bottom of the screen, or use any combination of the three. If you have a line of code that's already similar, you can even use copy and paste commands.
The code in the window controls the suppression. Here's a quick key of what the code does.
If Hole_Type = "Threaded_Holes" Then ==> If the mutli-value is set to "Threaded_Holes" then...
Feature.IsActive("Threaded_Hole") = True
Feature.IsActive("Thread_Pattern") = True
Feature.IsActive("Clearance") = False
Feature.IsActive("Clearance_Pattern") = False ==> This code sets the Threaded Holes to calculate, but suppresses the clearance holes
Elseif Hole_Type = "Clearance_Holes" Then ==> States that if the 'Hole_Type' Parameter is set to "Clearance_Holes" Then..
Feature.IsActive("Threaded_Hole") = False Feature.IsActive("Thread_Pattern") = False Feature.IsActive("Clearance") = True Feature.IsActive("Clearance_Pattern") = True ==> This group of code inverts the previous section. This is a great place to use that copy and paste I was talking about!
End If Tells iLogic we've got all the selections we need.
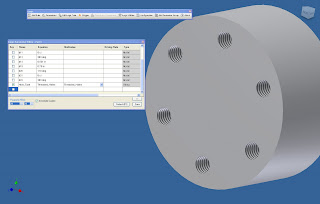
With that finished, we can return to the iLogic parameters and change our multi-value settings. Now the rule controls the selection.
One final note. The first thing you might say (as a matter of fact, I did too), is 'I can use I-parts for that'. You'd be right of course. I-parts can do exactly this. So why go throught he effort of writing this code, even if it is simple?
I think this really comes into play for templates. IYou can easily create new parts from these, and not have to worry about things like proxy files that I-parts require. iLogic grants a level of flexibilty that I-parts aren't able to easily achieve, especially when the configurations get more complex.
Don't get me wrong, I think I-parts are a great tool. For things like library parts, I think they're a great solution, and I'll happily use them in that capacity.
So that's the first in many things. Look for more info as I go deeper into this, and my other, worlds.




No comments:
Post a Comment