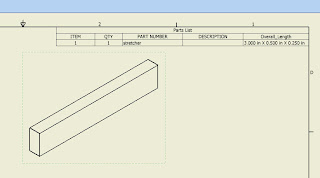
I was asked a little while ago how to get properties into a Bill of Materials, but in the format of 'length X width X Thickness' look.
Now, a chance to document it!
So here we go.
First, a picture of the part I'll be using for this portion of the blog. I've circled the dimensions I'm going to work with.

The first thing you need to do, is rename the variables in your parameters screen, and name them something that is a little more sensible than the Inventor issued variable names. (Okay this isn't REALLY necessary, but it'll make life easier).

Once this is finished, go to File>I-Properties and create a custom variable with the following format. =


Now, we configure the drawing!
First we've got a drawing with the part, and the Bill of Materials placed, but we still need to add our new property.
First we edit the BOM (right click on the BOM and hit 'Edit Parts List' and go to our 'Column Chooser'

Once in the Column Chooser, create a New Property, and enter the name you entered in the I-Properties.

Hit OK (a few times) to close all your dialog boxes. The property will show up in the BOM, and now you can adjust the formatting until you have the look you want.

The other advantage of this particular method, is if your part changes, the parts list will also update as well.
Happy Inventing everyone!

