Recently I was playing with some of the Load on Demand settings, and for some reason, files were loading really slowly.
I knew Inventor could load quicker than this, so I kept messing with my settings. Finally, I stumbled upon something that seemed to help.
When you hit the 'File>Open' option in Inventor, click on the options button.
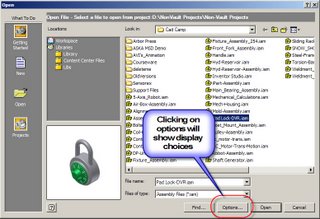
The default open options will come up.
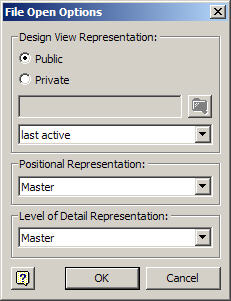
By changing the Last Active option under 'Design View Representation' to Master, I was able to drastically affect the open time of some files. (In one file, the open time dropped from seven minutes to one minutes).
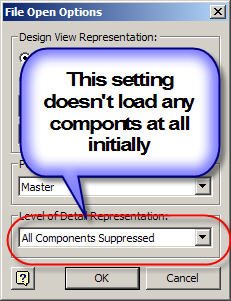
The other option is to load will all components suppressed. This will load the assembly the quickest. You can then right click on selected assemblies and components to load them up individually. This can really help when assemblies get really large, and you only need to work on a small section.
That's it for now! I'm hoping to write up another section on creating your own Load on Demand views soon. Until then. Happy Halloween!
Tuesday, October 31, 2006
Monday, October 16, 2006
A Face for Radio....
Friday I got to do something I never thought I'd get to do. I was in a video for the 3D Connexion.
For those who may not be familiar with the products, 3D Connexion makes '3D navigation devices'. Essentially, they allow you to rotate, spin, and zoom your model without having to use your mouse wheel or zoom keys.
I've had a SpaceTraveler for about eight months now, and I have to say that I'm spoiled, and I miss it if I'm using a computer that doesn't have it.
So when I was asked to do the video, I jumped at the chance. I don't mind helping endorse a product that I really do enjoy using.
So keep an eye out! If you run across one of these videos, you may recognize the back of my head!
Tuesday, October 10, 2006
To Section or Not to Section?
Another question I was asked recently was; How do I tell and Inventor drawing to section Content Center components when I insert them.
There's actually a global setting in the Applications Options.
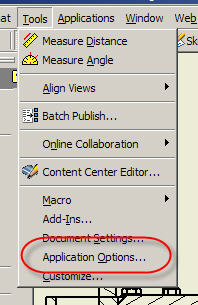
1) First, go to the Tools>Application Options Pulldown.
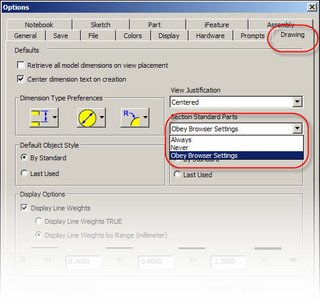
2) Choose the Drawing Tab, and Select the Section standard part flyout.
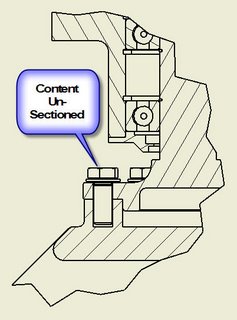
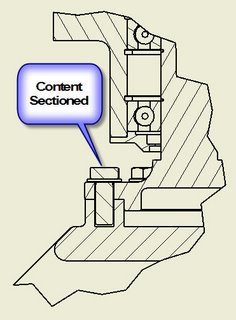
This setting allows you to choose whether or not Content Center parts are always sectioned, never sectioned, or obey the browser settings.
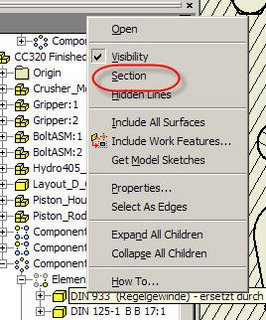
On a more 'one-to-one' basis with your components, you can also locate a particular part in your browser (it doesn't even have to be a Content Center part!), right click on it, and choose section from there. This can be time consuming for a large number of components, but is perfect when you have to just get one or two at a time.
Happy Inventing everybody! I'm off to the Design-2-Part show in San Diego for the next two days!
Thursday, October 05, 2006
Inventor can be Flexible!
A common question I've heard lately is 'How do I allow my subassemblies to move like they really would?'
The answer is make your assemblies flexible. It's as simple as right clicking an choosing the 'flexible' option.
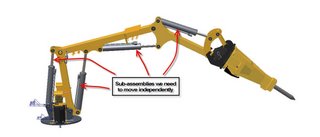
In this example, we have a demolisher arm. There are four pistons that are all instances of the same assembly.
All you have to do, is right click on each sub-assembly, and choose 'Flexible' from the Pop-up menu.
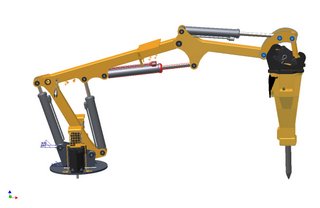
Once this is done on each sub-assembly, they will move independently from each other, instead of behaving like rigid bodies.
Starting Position!
Alternate configuration created by dragging and using Flexible Pistons!
Subscribe to:
Posts (Atom)